How to add a Camius IP camera, DVR, or NVR to the Camius View smartphone app?
The Camius View app is free on iOS and Android and gives you remote access to any Camius NVR, DVR, or IP camera from your phone or tablet. Before adding a device to the app, four setup steps must be completed on the recorder side.
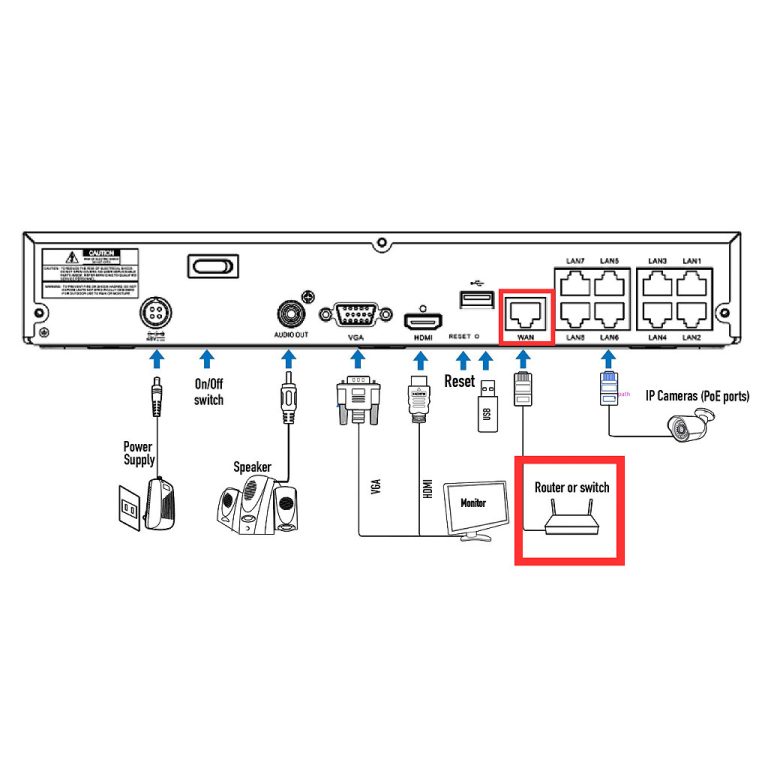
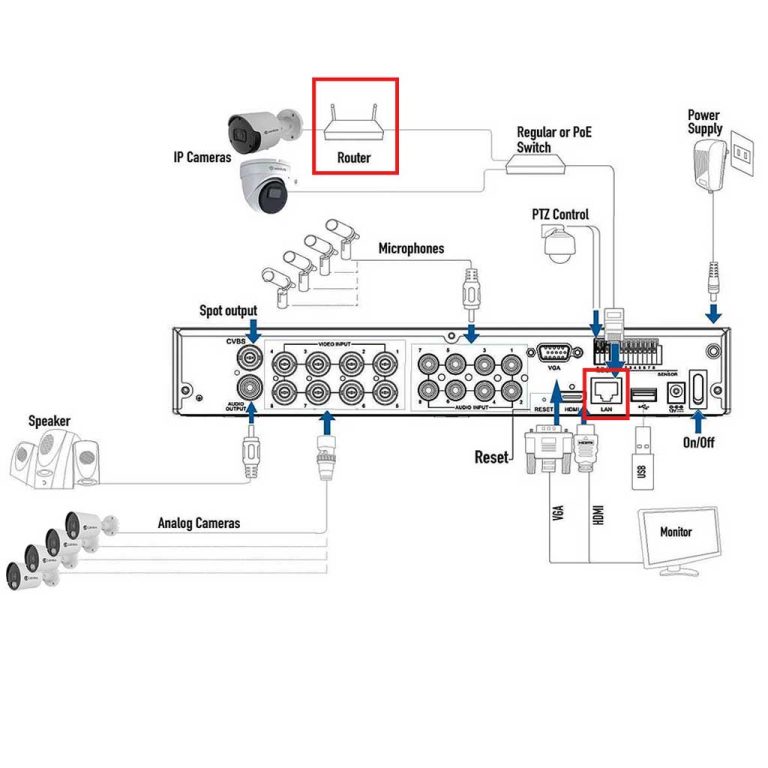
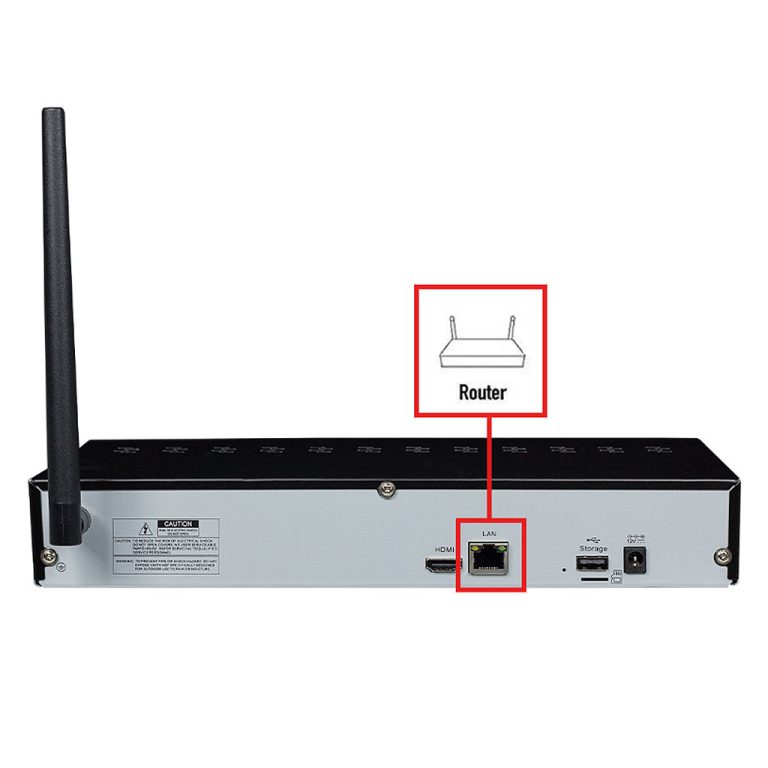
- Connect your Camius NVR, DVR, or wireless NVR to your router using an Ethernet cable plugged into the LAN port on the back of the recorder.
- Open Setup, go to Network, and confirm DHCP is turned on so the router assigns the recorder a working network address.
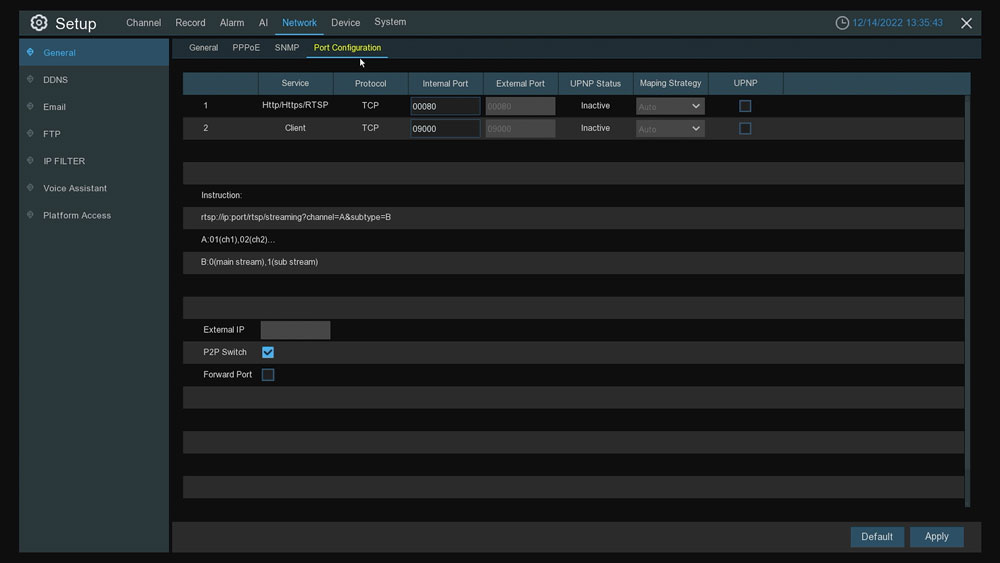
- In the same Network menu, turn the P2P switch on.
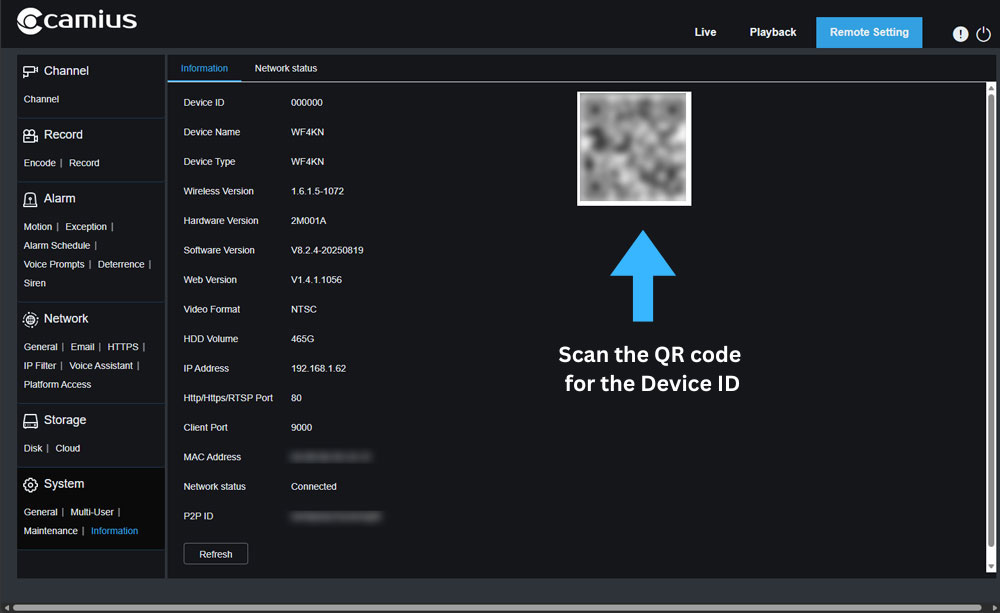
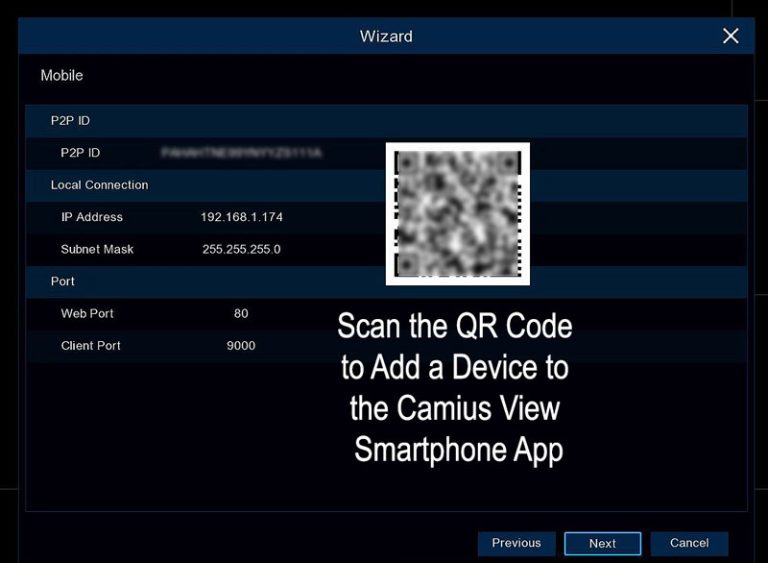
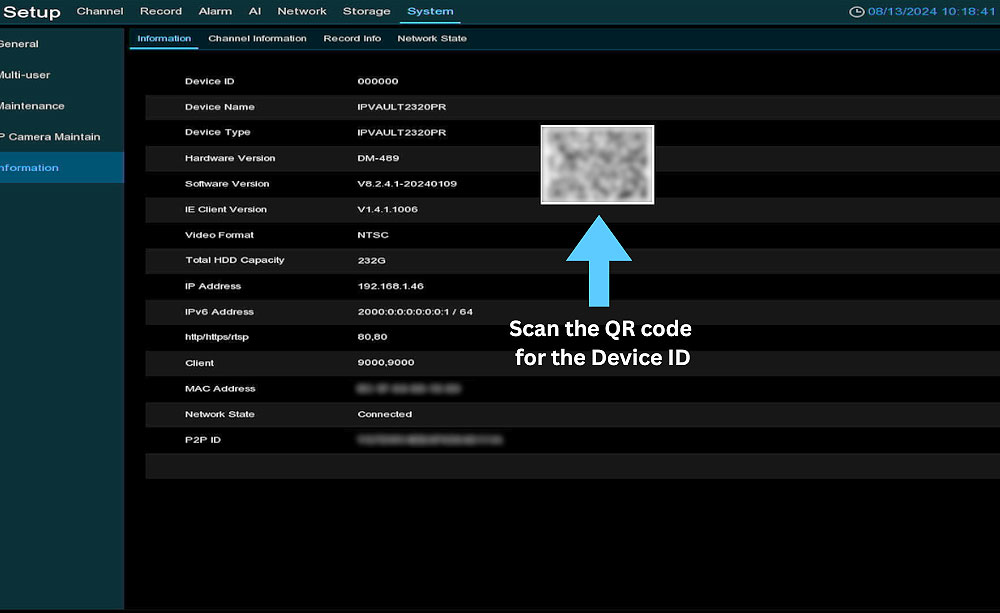
- Then locate the P2P ID for your device. The P2P ID appears on the label printed on the recorder, on the System >> Information screen when a monitor is connected via HDMI, and in the web browser under Remote Setting.
Once those four requirements are in place, download the Camius View app, open Devices, tap the plus sign, and choose NVR/DVR/IPCAM. Add your device by scanning the QR code, searching the local network, or entering the P2P ID by hand. Scanning the QR code is the recommended method and enables full remote viewing without port forwarding.
Requirements Before Adding Your Device to the Camius View app
- Connect your Camius DVR or NVR to your router using an Ethernet cable from the LAN or WAN port on the back of the recorder. The picture below shows the LAN port location on the IPVAULT1128PR as an example. Other Camius recorders use the same layout. Camius includes a blue network cable for this connection, or you can use your own good network cable.
2. On the recorder screen, open Setup then Network. Make sure the DHCP box is ON so the router gives the recorder a working network address.
3. In the same Network menu, turn on the P2P switch.
4. Find the P2P ID (QR Code). It is printed on the device label and also appears in the recorder menus.
- If you are using an HDMI monitor, go to Setup >>System >> Information.
- If you are using a web browser, go to Remote Setting >> System >> Information.
This is a straightforward step-by-step guide on how to add Camius NVR, DVR, or IP cameras to the Camius View app.
Download and install the Camius View iOS or Android app on your smartphone or tablet.
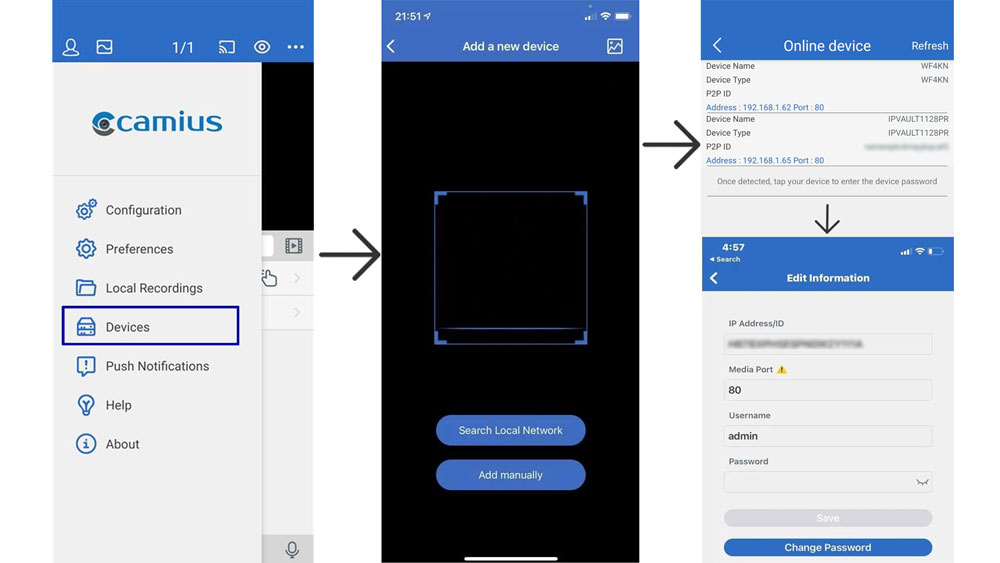
On the first run, the app will require network access and other permissions; once authorized, the app will start a tutorial highlighting the add button. To get to the add device button later, Tap on the top left menu icon and then on Devices to open the Device Manager page
- Tap on the main menu icon

- Tap on the Devices icon
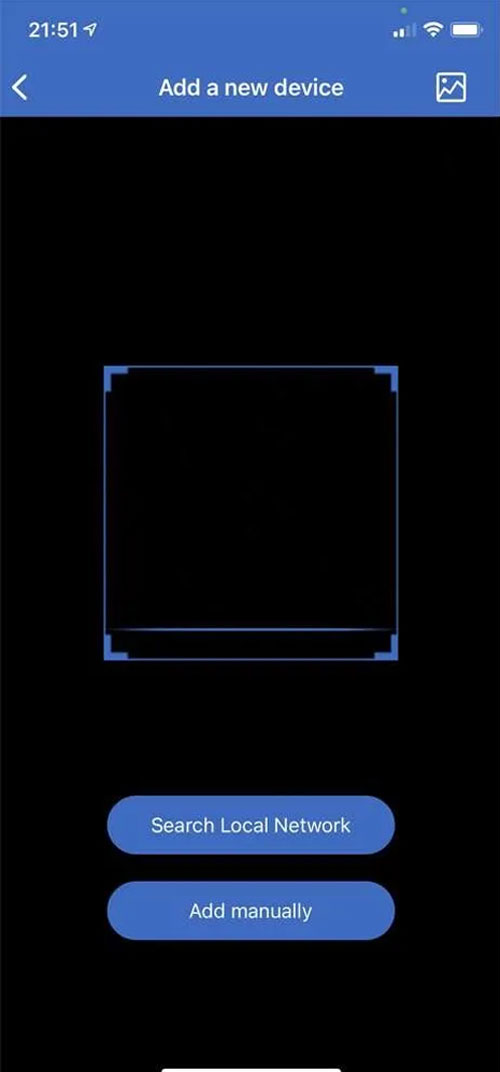
to open the Device Manager page, and tap on the Plus icon ‘+’ to add a new device. - Choose NVR/DVR/IPCAM and then select one of 3 ways to add a device to the app using a Search Local Network (option 1), QR Code Scan (option 2), or Add manually (option 3)
Option 1: Add Device via Local Network Search
- Open the app and tap Devices to go to the Device Manager.
- Tap the + icon, then select NVR / DVR / IPCAM.
- Tap Search Local Network.
- When your Camius device appears, select it and enter the device password you created earlier.
Media Port Settings
- Enter the correct port number in the Media Port field:
Use Port 80 for R-Series recorders
- IPVAULT1128PR
- IPVAULT2256PR
- IPVAULT2320PR
- IPVAULT8256R
- IPVAULT4640
Analog Hybrid DVRs (Digital Video Recorder)
- TRIVUALT4K184R
- TRIVAULT4K184R2
- TRIVAULT2168R
- TRIVAULT4K2168R
- WF4KN (Wireless NVR)
For IP cameras (R-Series models):
- SPOT8R / SPOT828A-R / SPOT828A-RB
- BOLTX536R / IRIS528R
- IRIS5R / BOLTX5R
- GUARDVR4KR
- SCOUT4K4XPTZ
- BOLTVM5R
- BOLTVM5R10X
- Use Port 9000 for non-R-Series devices (older IP cameras, DVRs, and NVRs).
Important Note
- If you add the device using its local IP address, you will only be able to view the cameras while connected to the same network.
For remote viewing, you must set up port forwarding on your router.
Option 2: Add Device via QR Code or Device ID (Recommended)
-
Open the app and go to Devices to access the Device Manager.
-
Tap the + icon, then choose NVR/DVR/IPCAM.
-
When the QR code scanner opens, point your phone’s camera at the QR code. The app will automatically scan it.
Where to find the QR code:
-
It is on the label of your Camius NVR, DVR, or IP camera.
-
On the System Information screen (viewable on a monitor connected to your NVR or DVR).
-
In the web application, under Remote Setting, when you access the device through a web browser.
-
Check if your device is online, briefly turn off your phone’s Wi-Fi, and let the app reload.
-
On the device page, enter the password you created earlier and tap Save. The app will confirm once it’s connected.
You can also add your Camius device manually by entering its P2P ID (recommended).
IMPORTANT: If you add the device using a local IP address, it will only be accessible in the app when your phone is connected to the same local network.
If your device has a public IP address, you can access it remotely by setting up port forwarding described in this guide.
Live View
- On the main App View page, tap on a device to view its channels, double-tap on a channel to zoom in, and return to multi-view again.
- You can zoom in on a single channel with the spread gesture and zoom out by pinching.
- Switching to landscape mode on your smartphone or tablet gives you a full-screen view.
Playback
- Tap the
icon to launch playback, then tap the calendar icon
to pick a day with recordings. - Scroll the bottom colored bar horizontally to pick the time of day for playback, the
icon saves a snapshot, and the
icon records on demand into your smartphone or tablet’s storage.
Push Notifications
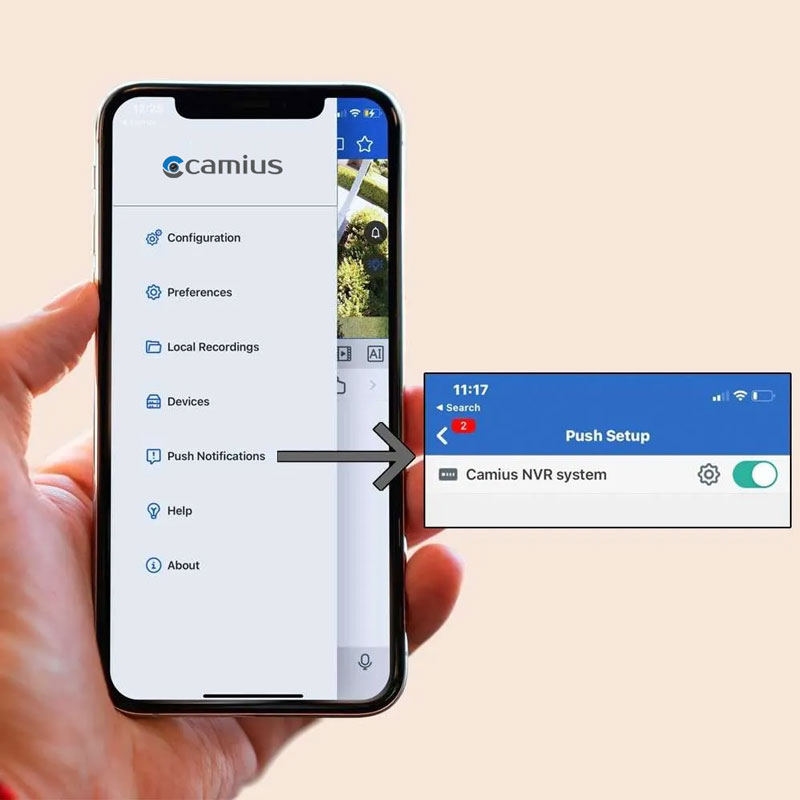
Tap on the
icon and then the Push Notifications icon
, select the device and enable the desired per-channel motion detection alerts, disk error detection alerts, and more.
More about:
Lorem ipsum dolor sit amet, consectetur adipiscing elit. Ut elit tellus, luctus nec ullamcorper mattis, pulvinar dapibus leo.
Camius View Security
The Camius View app uses TLS with AES to encrypt traffic. Login uses SRP-6a, so your password stays on your phone. The recorder keeps only a verifier. During login both sides prove they know the secret without sending it. Remote access works by Device ID over encrypted P2P. No port forwarding. Video stays on the NVR.
Think of it as a strong lock for data that uses one secret key. Common key sizes are 128 and 256 bit. It is fast and trusted worldwide.
This sets up an encrypted tunnel between the Camius View app and your recorder, or a relay if needed. It helps block snooping and tampering.
During login your password stays on your phone. The recorder stores only a math-based verifier, not the password. Both sides prove they know the secret without sending it.
- If you can’t access your Camius security device in the app, check this guide
- If you forgot your Camius recorder’s password, please click here for the password resetting tutorial.
How to Turn Off P2P and Run Your Camius Recorder Completely Offline
Some users need a security system with no connection to external servers. If your installation requires full isolation from the internet, turning off P2P on your Camius NVR or DVR is the correct step.
P2P (peer-to-peer) is the feature that lets the Camius View app connect to your recorder remotely using your Device ID. When P2P is off, your recorder no longer contacts any outside server to establish a remote connection. Your footage always stays on the installed hard drive regardless of whether P2P is on or off. Turning P2P off simply stops the recorder from reaching out to outside servers entirely for remote viewing purpose.
Steps to turn off P2P on a Camius NVR or DVR
- On the recorder, open Setup, then go to Network.
- Locate the P2P switch.
- Turn the P2P switch OFF.
- Save your settings.
That is the complete process. The change takes effect immediately after saving.
What happens when P2P is turned off:
- The Camius View app will no longer connect to your recorder remotely using the P2P ID or QR code method. App access over the internet stops.
- The recorder continues to record normally to the installed hard drive. Local recording is not affected in any way.
- You still access live view and playback on a monitor connected by HDMI directly to the recorder.
- Local network access remains available. If your phone or computer is on the same network as the recorder, you connect through the local IP address using the app or a web browser.
- Push notifications from the Camius View app stop. Notifications require an active P2P connection to reach your phone.
- The recorder sends no data to outside servers. Your footage and device activity stay fully on-site.
If you need remote access after turning off P2P, the only supported method is port forwarding through your router. That method is covered in the DDNS and port forwarding setup guide. Port forwarding allows remote access without using P2P and keeps the recorder off Camius cloud infrastructure.
For questions about offline deployment for a business or multi-site installation, contact Camius tech support,
FAQs about Camius View smartphone app
How do I connect my Camius NVR/DVR to the Camius View app?
On your network or digital video recorder, go to the Startup Wizard or Network menu to confirm your P2P ID checkbox is ticked and make sure the device is Connected to the network. Then, scan the QR code in the Camius View app on your phone to link your system.
Does encryption affect video quality or speed?
No. Encryption works in the background without reducing resolution or frame rate. You still get clear live viewing and smooth playback with added protection.
What should I do if I forget my recorder password?
Use the password recovery options set during the initial setup. Depending on your model, you can reset via security questions, reset button, or by contacting Camius support with your device MAC address & the system date.
How do I adjust the deterrence features like lights and siren?
On your recorder, go to Setup → Channel → Deterrence. From there you can turn the light or siren on or off, set how long they stay active, and create a schedule. In the Camius View app, you can also manually trigger the lights and siren or turn them off at any time.
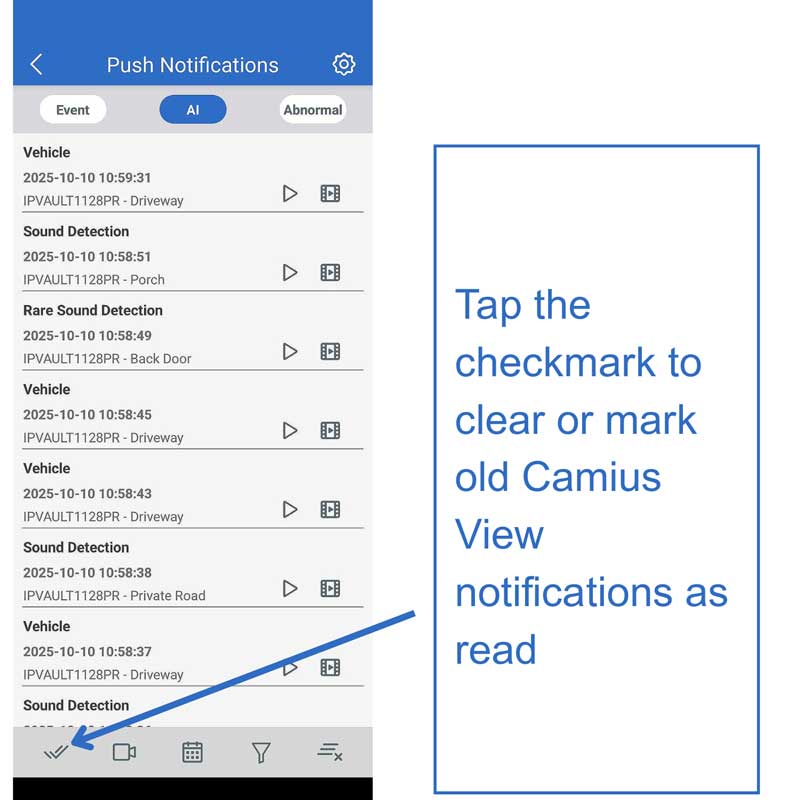
Why did my Camius View app stop sending notifications on my phone?
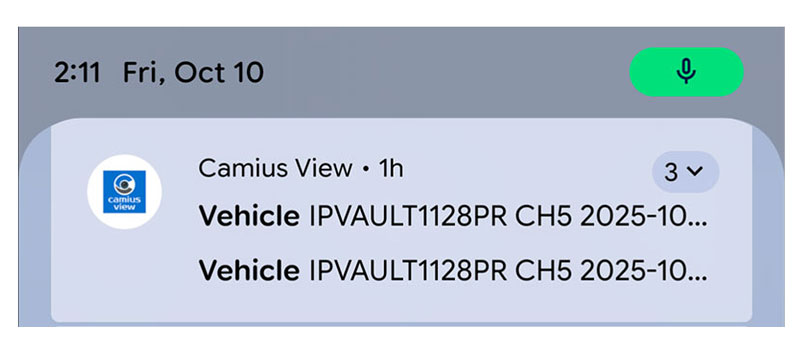
If you previously received alerts and they stopped, your phone likely reached its notification limit. When about 49 notifications are received but not checked, most smartphones stop accepting new ones. Open your phone’s notification panel, tap the checkmark to clear or mark all old Camius View notifications, then test again.
How do I run my Camius NVR or DVR as a fully offline system with no internet connection?
Go to Setup, then Network on your recorder. Turn the P2P switch OFF and save. The recorder will stop connecting to outside servers immediately. Local recording continues normally. Remote access through the Camius View app will stop unless you set up port forwarding through your router. Push notifications also stop when P2P is off. If you only need local monitoring, no additional changes are needed.